
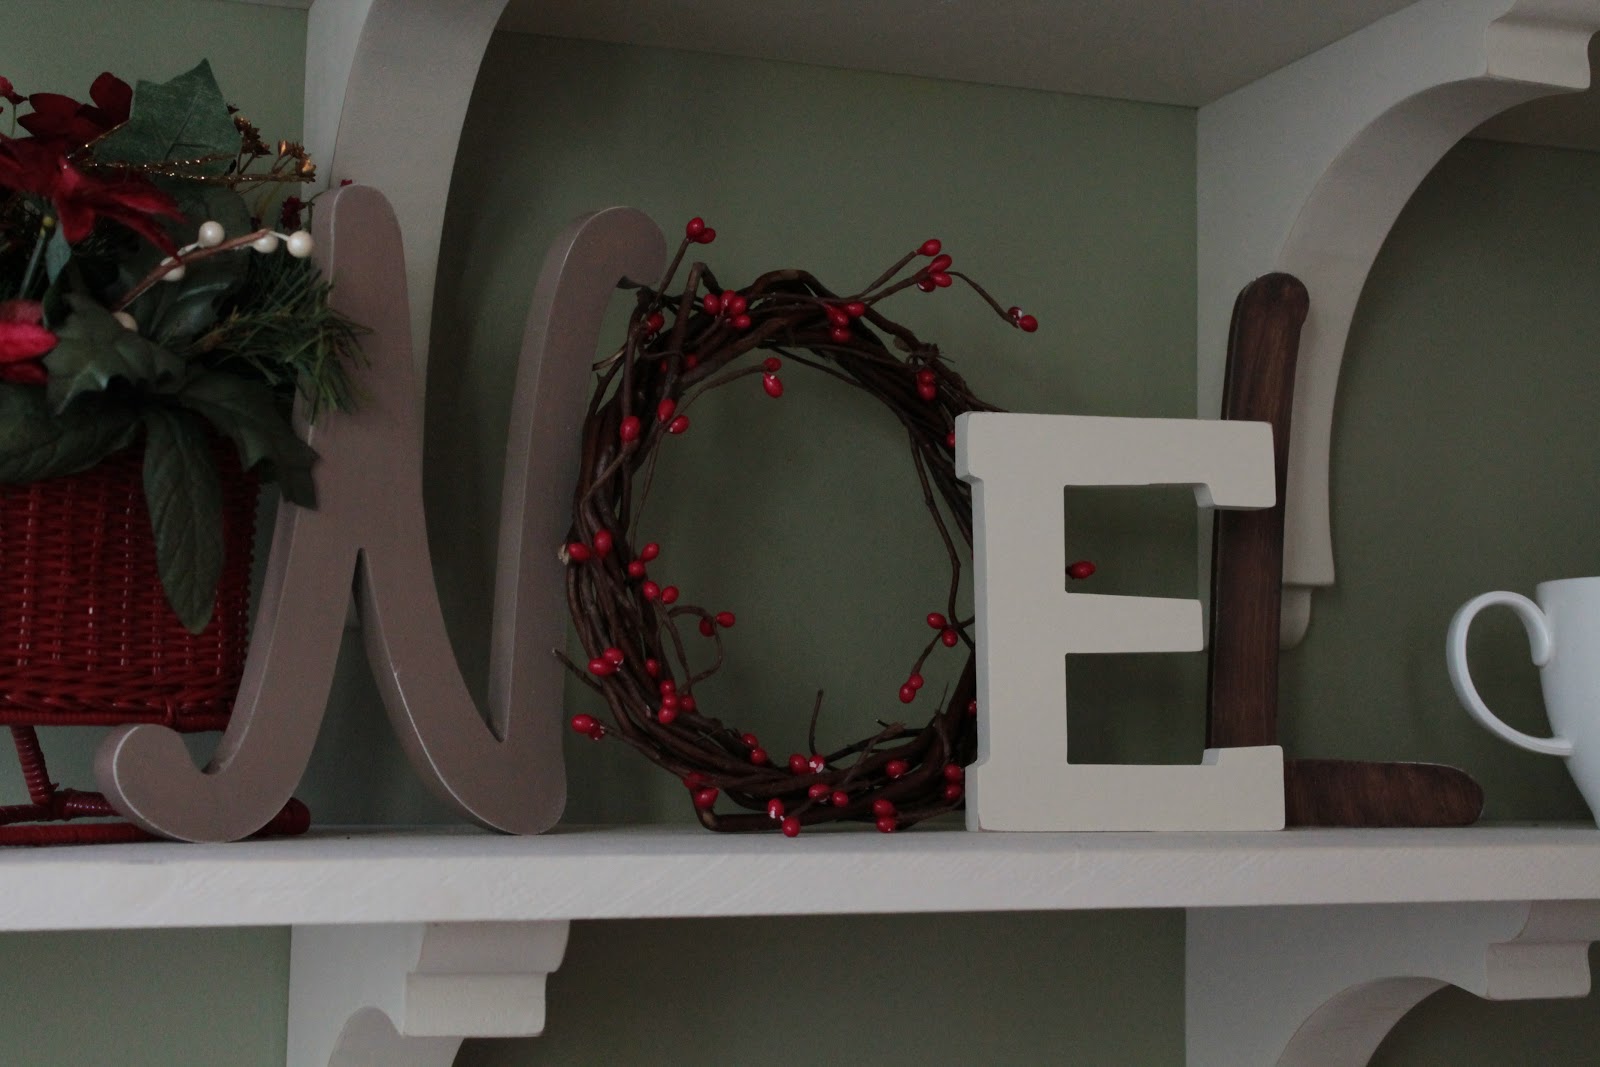
I love this Noel display on my open kitchen shelves!
Here is how I made it:

You will need (clockwise from the top left corner):
a couple paintbrushes and plastic basins for mixing, 2 paint colors (I used a chocolate brown acrylic and the off white that I used to paint the shelves with), a small grapevine wreath and red berries to make your "O", snader or sand paper, and wooden letters (the best selection I found was a Jo'Ann's but you can also order different fonts online here).

Give the letters a quick sand to make sure the paint will adhere nicely.

To paint my letters I did the "E" in the light color (1), the "L" in the dark color (2) and the "N" as a mixture of the two (3). If you wait and paint the medium letter last, you will only need 2 brushes instead of 3!
Note: If you are going for a darker medium color, then add the lighter color little by little to the darker color. If you are going for a lighter medium then do the opposite - otherwise you will be wasting too much of your paint!!

I made sure that my brush strokes were visible and pointing all of the same way. You can see in the "E" above that the brush strokes are diagonal and all pointing up. A simple way to add interest!

Here's how the letters turned out! For the light "E" I only needed 1 good coat (1). I did 2 coats for the medium "N" (2), and I really liked how the "L" looked after just 2 coats (3), so I left it that way. I also picked up the sander again and did a light sanding around the edge to shabby them up a bit.

Ok, so about this "O".
grapvine wreath (Dollar Tree) + berry garland (Michaels) = "O"
And there you have it!
Gorgeous!!! Pinning it :-)
ReplyDelete