Showing posts with label Food. Show all posts

Tuesday, October 1, 2013

Two New Favorite Fall Desserts

Pumpkin Streusel Swirled Cream Cheese Pound Cake {recipe here}

Pumpkin Brownies {recipe here}
 I've made both of these in the past few weeks and they are both melt-in-your-mouth-goodness.  The cake takes a little bit of a time commitment, but I promise you is worth every minute.  On the other hand, the brownies take no time at all. So, so delicious.  No, seriously, stop gawking and go make those brownies right now!

Do you have any favorite fall desserts!?!
Linking up with Ashley

Tuesday, July 23, 2013

Zucchini Pie


{Forgive these terrible food shots!}
This is one of the most delicious brunch dishes I have ever had.  My mom re-acquainted me with it when we were down in Charlotte a few weeks ago.  It was so good, I had to have it again!  So, I used up the last of our summer garden zucchini and whipped one up.  Also I have to share that while we were at La Farm, we picked up one of their fresh baguettes to take home and I made The Pioneer Woman's fantastic Cinnamon Baked French Toast to go with it.  WOW, that fresh baguette was so so good!! So, moral of the story, always make cinnamon baked french toast with a fresh baguette from La Farm to go with your zucchini pie.  It will make you so happy.  So, so happy!

Monday, July 22, 2013

La Farm


Have you ever heard of La Farm?!?  It is tucked away in a little corner of Cary.  I can't believe I have lived in the Raleigh-Durham area for 7 years, and I just found out about La Farm.  They had me at "European cafe"!!!  The owner is from France and the food is pretty authentic.  Wesley and I headed over Friday night for our date night and we fell instantly in love with it!  His croque madame was very well done, and my ham and gruyere baguette was good (not exactly like I remembered, but close).  But, as soon at bite into a pan au chocolate... I was back having breakfast in the basement kitchen of our hotel near L'Arc de Triumph in Paris in 2009... Needless to say, if you go and only have one thing, have one of their pastries.  But seriously, it is all so good!!!

Hope you had a great weekend!
Linking up with Molly and Carissa 

Monday, July 8, 2013

Easy Lemon Pound Cake

Our long holiday weekend flew by!  My most favorite part, had to be the food.  Hands down ;)  We are now officially obsessed with Spicy Dr. Pepper Shredded Pork.  I made it for the 4th, and we have not stopped eating it since.  So glad we loved it too, since I made 4.5 lbs of it.  It was the smallest cut of shoulder I could find...I swear!! 

The other winner of the weekend, was this amazingly easy and moist lemon pound cake. I got the recipe out of an allrecipes magazine that I got at the beginning of summer.  I made a few changes to the original.  The cake is only 5 ingredients and the glaze only 4.  Ready for it? Here it is...

Lemon Pound Cake

Cake
1 (18.25 oz) package lemon cake mix
1 (3.4 oz) package instant lemon pudding mix
3/4 c vegetable oil
4 eggs
1 can lemon-lime flavored carbonated beverage

Glaze
1c Powdered sugar
1-2T milk
1t vanilla extract
1t lemon juice

Preheat the oven to 325 degrees F. Grease and flour a 10-inch Bundt pan.  In a large bowl, combine cake mix and pudding mix, then stir in oil.  Beat in the eggs, one at a time, and the stir in the lemon-lime soda.  Pour batter into prepared pan.  Bake in the oven for 40-45 minutes, or until a toothpick inserted into the center of the cake comes out clean.  Allow to cool.

To make the glaze, beat the sugar, 1T of milk, vanilla and lemon juice.  Add an additional tablespoon of milk to thin as needed.  Pour over top of cooled cake.

Hope you all had a Happy 4th!
Linking up with Carissa  and Melt in Your Mouth Mondays

Wednesday, June 5, 2013

Perfect Mac & Cheese

Ok, let's talk for a minute about one of my favorite comfort foods...mac & cheese.  Seriously, does it get any better than this?  I will admit that it took a million several attempts to make it from scratch.  Let, me tell you...it was well worth the effort.  You know you have a recipe right when you stop looking for different versions of it.  This is that mac and cheese for me.

Mac & Cheese
serves 6

1 lb bow-tie pasta or elbow macaroni
3 T butter
3 T flour
2 c chicken broth
1 c milk
1 t Worcestershire sauce
2 dashes hot sauce
1/2 t paprika
1/2 t black pepper
8oz colby jack or cheddar cheese, grated

Cook pasta according to package directions in salted water.  Heat a large saucepan over medium heat and melt butter.  Once melted, whisk in flour for 1 minute.  Whisk in chicken broth and bump up the heat to medium high and stir until thickened.  Add milk and whisk until thickened.  Add Worcestershire sauce, hot sauce, paprika, and black pepper.  Stir until combined.  TURN OFF HEAT and stir in the grated cheese.

Once the pasta is done, drain, and add to cheese sauce in saucepan.  Stir to combine.  Adjust seasonings and serve immediately.

Monday, May 13, 2013

Pan Fried Chicken & Milk Gravy

When I think of comfort food, this is what I think of first.  There is nothing better to end a long day with one of your favorite meals. Pan fried chicken & milk gravy is so good, especially dishing it up over a creamy bed of mashed potatoes. Even in my college dorm freshman year, I had enough cooking pans to lug to the dorm kitchen and whip this up!  When I find myself craving it, no questions we cancel whatever we were going to have for dinner and have this instead.  This recipe serves 2-4...just depends on how big your appetite is!  I find that one chicken tenderloin is the perfect portion.  Wesley, or course, loves to have two! 

Here is a breakdown of how I make it.  
Full recipe at the bottom of the post!

 First, place the chicken in a freezer ziploc bag and marinate in 1/2 cup of milk for at least 30 minutes.  Get all of the air out of the bag and zip it back up, placing the zipped bag on a cutting board.  Pound each tenderloin out with a meat mallet....or rolling pin..whatever floats your boat.  By keeping it in the bag while you do this, you keep the mess nice and contained.  No one likes chicken bits flying over their kitchen!
Next, mix up the 1/2 cup of flour, salt and pepper and smooth out on a plate.  One by one, dredge the tenderloins in the flour.

Add the floured chicken to a hot skillet (medium-high heat) after melting 1 T of butter.  Since they are thin, they will only need about 2 minutes per side.

 They should be nice and golden brown on the outside!

 When they are done, put them on a plate so that you can make the gravy in the same skillet.  You will want all of those nice, buttery chicken drippings to start the gravy off with.  

 Turn the heat down to medium and add 2 more tablespoons of butter and the 2 tablespoons of flour.   Whisk them together to form a rue.  Cook for 1 minute, then whisk in the chicken broth and milk.  Turn up the heat to high and whisk while the gravy thickens and bubbles up as above. Once it is as thick as you like it, add some pepper, the Worcestershire and hot sauce (a dash each should do!).  I normally do not add salt, since I use salted butter, but once you taste it, you can adjust the seasoning accordingly.

So delicious!

Pan Fried Chicken & Milk Gravy
serves 2-4

4 boneless skinless chicken tenderloins
1/2 cup of milk
1/2 cup flour
1/2 t salt
1/2 t pepper
1 T butter

Gravy:
2 T butter
2 T flour
1 cup chicken broth
1/2 cup milk
dash of Worcestershire sauce
dash of hot sauce
1 t pepper

Chicken:

First, place the chicken in a freezer Ziploc bag and marinate in 1/2 cup of milk for at least 30 minutes.  Get all of the air out of the bag and zip it back up, placing the zipped bag on a cutting board.  Pound each tenderloin out with a meat mallet. Combine the 1/2 c flour, salt and pepper, and spread out on a plate. Dredge each side of the tenderloins in the flour mixture. Heat skillet on medium high heat and melt 1 tablespoon of butter. Add the floured chicken and cook two minutes per side, or until golden brown.  Remove from skillet and set aside.

Gravy:
Turn the heat down to medium and add 2 more tablespoons of butter and the 2 tablespoons of flour.   Whisk them together to form a rue.  Cook for 1 minute, then whisk in the chicken broth and milk.  Turn up the heat to high and whisk while the gravy thickens and bubbles up as above. Once it is as thick as you like it, add some pepper, the Worcestershire and hot sauce (a dash each should do!).  Taste and adjust seasoning accordingly.  Serve immediately.

Linking up with Molly and Carissa  and Melt in Your Mouth Mondays

Monday, April 29, 2013

Chicken Spaghetti


Have you ever had chicken spaghetti?  I will confess that growing up, this was one of my least favorite things my mom made.  We called it "chicken tetrazzini" back then. And the weird thing is, I couldn't tell you why I didn't like it.  I liked all of the ingredients...spaghetti, chicken, mushrooms...there was nothing I had to pick out or around...I could just never finish it, and it was never something I asked for.  My sister loved it though, so we would have it on occasion.

A few weeks ago I saw my favorite, Ree Drummand, making a southwestern version on her show.  I pretty much LOVE everything she makes, so we gave it a try.  Oh my goodness...it's my new favorite!

I changed it up just a bit, including scaling it down (even though we like it, the 2 of us would never have finished the whole giant casserole dish that she makes!). I marinate the chicken in Italian dressing and either roast it in the oven or grill it. It adds a whole extra level of flavor! I also use red bell peppers instead of the pimentos and green peppers. You can make it ahead, and stick it in the oven before dinner the next night, or make it all in one go. Working full time, I usually plan ahead and make the chicken one night, throw it all together the next night, and then pull it out of the fridge the next night and toss it in the oven for 30 minutes.  That may sound like a lot....but I find it easier to split up the prep work. Here's my version:


Chicken Spaghetti
serves 4-5

4 chicken tenderloins (or 2 large chicken breasts)
Italian dressing
1/2 lb thin spaghetti
4 cups chicken broth (reserve 1 cup of the broth after cooking spaghetti)
1/2 small onion, finely diced
1/3 cup red bell pepper, finely diced
1 can cream of mushroom soup
1 & 1/2 cup shredded Colby jack cheese, divided
1/2 t Lowery's seasoning salt
1/8 t cayenne pepper
salt and pepper to taste
cilantro, chopped, for garnish

Marinate the chicken in the Italian dressing for at least 20 minutes.  (I like to have it sit overnight!) Roast in oven at 350 for ~15-20 minutes until done or grill, then slice once cooled.  Bring the broth to a boil and cook spaghetti al dente according to package directions.  Add water to the pot if more liquid is needed.  Once the spaghetti is cooked, remember to scoop out 1 cup of the broth and reserve for later.

If desired, toss the bell pepper and onions in some olive oil and saute on the stove in a medium pan for 1-2 minutes. (This will take the edge off of the raw vegetables, but still leave them nice and crunchy.) In a large mixing bowl, combine the spaghetti, chicken, peppers and onions, cream of mushroom soup, and 1 cup of the shredded cheese.  Season with the seasoning salt and cayenne pepper.  Add salt and pepper to taste if needed.  Next, add 1/2 cup of the broth and stir.  If more liquid is needed, then add more a little at a time.  Pour into a 8 x 8 casserole dish and top with the remaining 1/2 cup of cheese.  Bake at 350 for 20-30 minutes, until bubbly. Serve immediately and garnish each serving with cilantro if desired.

Bon Appetite!
Linking up with Molly and Carissa  and Melt in Your Mouth Mondays

Thursday, April 18, 2013

My Favorite Chocolate Chip Cookie

When I was growing up, my mom made these amazing chocolate chip cookies.  I can't decide which I liked better... being able to lick the beaters (sometime outside with the dog...prior to adding the chocolate chips of course!)...or having them fresh out of the oven, gooey and warm.  The recipe she used is from her old Southern Living collection...you know, the ones where each book is just about one thing.  Like poultry...and vegetables...and cookies and cakes.  

These are called Defense Cookies.  It's the recipe that apparently thousands of women used to make and send to their husbands, brothers, and beau's serving in World War II.  They would line the boxes with parchment paper and stacks of cookies and ship them over.  It's no wonder that this was the reception when the war was over and the men came home...
Well, maybe there were a few more reason's then that... ;) 
Here's the recipe:

Chocolate Chip Cookies

1/2 c sugar
1/4 c firmly packed brown sugar
1/2 c Crisco
1 c all purpose flour
1/2 t baking soda
1/2 t salt
1 egg, beaten
1t vanilla extract
1 package chocolate chips
1/2 c chopped pecans (optional)

Combine the sugar and Crisco in a mixer.  Mix until creamy.  In a separate bowl, add the flour, soda, and salt.  While the mixer is on low, slowly add to sugar and Crisco.  Mix well.  Add the egg and vanilla.  Stir in chocolate chips and pecans.  Bake at 350 for 8-10 minutes.  Yields: ~3 dozen. 

Wednesday, April 3, 2013

Shrimp & Grits

When I was home last Friday waiting for Wesley to get off of work, shrimp and grits sounded so good for lunch. I'll confess I had to call my mom to remind me how to make them.  Wesley isn't a huge fan so I didn't feel guilty at all whipping them up!  This recipe is a stacked version, so it can be easily adjusted for 1 or for a crowd.  Here's how to make them:

Shrimp & Grits
serves 4

1 cup grits (not instant or quick)
3 cups chicken broth
1 cup half and half
1 t salt
1 T olive oil
2-3 cloves of garlic, minced
2 cups bell peppers, diced
2 T butter
24 raw shrimp, peeled and devined
2 t cajun seasoning
salt and pepper, to taste
1 cup shredded white cheddar cheese
1/4 cup scallions, minced

In a saucepan, bring the chicken broth, half and half, and salt to a boil.  Add the grits and simmer according to package directions.  Heat the oil in a skillet over medium-high heat.  Cook the garlic and peppers for 2-3 minutes, until tender, then add the butter and shrip.  Cook for about 2 more minutes, until all of the shrimp are pink.  Add the cajun seasoning, salt, and pepper to taste.

Once the grits are done (they should be nice and creamy) scoop a serving into a bowl, top it with a handful of the white cheddar, and then a scoop or 2 (or 3 or 4!) of the peppers and shrimp.  Top it off with a sprinkling of those green scallions.

Enjoy!

Wednesday, March 27, 2013

Bacon Avocado Salad

Today, I am sharing one of the most delicious salad's I have ever made...bacon avocado!  It's such a cinch to put together, so it's one we've gotten into the habit of having on weeknights. 

Bacon Avocado Salad

Sping Lettuce Leaf Mix
1/4 cup feta cheese crumbles
2-3 pices of bacon per person, cooked and diced
1 Avocado, peeled and diced
Dressing of your choice (low fat homemade ranch pictured above)

I don't know about you, but I cannot eat a salad without some dressing...it's just too dry without it.  Here are a few Pinterest has deemed too delicious to pass up...

low fat homemade ranch
We used this one that last time we had this salad...it may not look like much, but it is really delicious!!

This has been on my to make list.  If just sounds so refreshing.

And for the over achiever...

Now go and make a salad for dinner tonight...(or at least the dressing!)


Linking up with The Vintage Apple

Monday, January 28, 2013

Secrets of Homemade Pizza


I will confess that I have not always been a fan of homemade pizza.  Growing up, I remember only wanting one kind: Papa John's.  My dad's love for it had corrupted any kind of appreciation for the homemade kind.

In college, things changed.  Poor starving college students know that eating out becomes a luxury that is few and far between.  I had discovered Trader Joe's and fell in love as soon as I walked inside.  (It is so painful that the closest one to me now is 45 minutes away!) They have ready made pizza dough for $1.  And it freezes beautifully.  I could get 2-3 personal sized pizzas from the dough. Thus, the college student began to fall in love with homemade pizza...


Over the years I have perfected it.  Here are a few tricks I have learned :

1. The Dough.  I am really picky about my dough.  I really despise the pre-cooked ones you can pick up at the super market, and don't even get me started on the insane notion of trying to use an english muffin as a crust.  Told you I was picky.  I use this recipe.  Once I found it and had it, I stopped looking for a new one. You can make it a night or two before, leave it in the fridge, and you don't have to roll it! The pre-made Trader's Joe dough is good too.  The trick for that one is to roll it out and cook it for 8 minutes or so before putting on the sauce and toppings...it doesn't like to cook all the way through with everything on it. Another reason I love the above recipe...don't have to do that step anymore!

2. The Sauce.  This is your opportunity to use your favorite marinara.  So use it!

3. The Cheese. I love to layer in between my toppings.  Example: Sauce, cheese, mushrooms, cheese, peppers, cheese, etc.  Just don't try and cover the entire thing with each layer...I guess unless you love cheese that much.  I am ashamed to say I have yet to figure out how to use the fresh mozzarella   Maybe one day I'll get it down.  It always seems to be watery/runny when I use it so I've stopped for now.  Nothing wrong with some good old fashion pre-shredded goodness!

4. The Toppings.  Get the ones you love, and don't be afraid to try new ones!  One of the beauties of homemade pizza is that it is 100% custom!  For a while I was on a veggie kick, so they turned out more like flat breads with roasted vegetables with a sprinkling of pepper jack cheese (yum!).  Have you ever had roasted garlic and onions on your pizza?  Life changing.  Seriously.  

5. Consider Personal or Sharing Pies.  Personal pizza are the best.  They are smaller (portion control!) and just for you.  So if you hate olives but your friend loves them...no big deal! (I am on team no-olives!) Of course, you can also split the pie right down the middle.  My sister and her boyfriend did that in the pic above.  Brilliant, no?!? 

6. Seasonings. You can pick up "pizza seasoning" in the spice isle.  It is an assortment of dried herbs...usually basil, oregano, and parsley.  I put some on every pizza.  Some.  Not a lot. A little goes a long way...

7. Olive Oil.  When my pizza turns out to be more like a flatbread with mostly toppings and little cheese, I like drizzling olive oil over the top.  Delicious.  Like 1 teaspoon or so. Have fun and fling it around! I skip this  if it's more like a traditional pizza.

8. Salt and Pepper.  On pizza?!? I know, I'm crazy right? Just a small sprinkling of salt and pepper over the top makes it oh so good.  But don't take my word for it.  Try it and find out for yourself.

9. Hot Oven.  I am totally guilty of throwing things in the oven while it is preheating.  You cannot do that with pizza.  Just trust me on this one.

10. The Broiler.  A lot of people are scared of the broiler.  But the broiler in small doses is a good thing.  It browns cheese in just the right places.  It makes the crust nice a crispy.  With pizza, the broiler is your friend.  I crank on the broiler the last 2 minutes of cooking time. Then I get perfection.

Enjoy!
Linking up here

Monday, January 21, 2013

Our weekend...in food

I have to confess that sometimes entire days get planned around the food I eat. Thanksgiving, of course, is one of those days. This weekend happened to also follow suit. I don't really know why, other than everything we ate just sounded so good this week that we had to have it all this weekend. 

So, here was our weekend, in food....


And then we ate leftovers...because we couldn't get enough the first time.
Hope you had a great weekend and ate some delicious things!

Monday, January 7, 2013

White Chili


Who doesn't love a good bowl of chili on a frosty winter's night?
My new favorite kind of chili, is white chili.  So delicious.

Speaking of chili, did you know that to Texans, chili isn't really chili if there are beans in it.  So true. Therefore, I suppose I am denouncing my roots by loving this. 

White Chili

1/2 onion, chopped
 2 cloves garlic, chopped  
jalapeño, chopped 
Pablano, chopped
1/4 c green or red pepper, chopped

1T olive oil  
1lb ground turkey or chicken 
4cups chicken broth
2 cans canollini beans, drained
1cup shoepeg corn
1T cumin
iT chili powder
1T dried parsley
1/4 c chopped cilantro
1 bay leaf

Toppings:
Tortilla Chips
Sliced avacado
Shredded cheese
Sour Cream

Saute the first 6 ingredients in a large pot.  Season with salt and pepper.  Add the ground meat and cook till brown.  Add the rest of the ingredients and simmer for at least 30 minutes.  Discard the bay leaf before serving.  Top with desired toppings.


Enjoy!

Thursday, December 13, 2012

Brown Eyed Susans {remix}


 Ever had one of these cookies before?

They were no stranger in my house growing up.  They are shortbread cookies with chocolate frosting and pecans.  My mom made them recently for a cookie walk (like literally 12 dozen of them), which gave me the idea to make some for one of our holiday parties.  However, this year we changed them up a bit and they turned out like this:


Beautiful right?
Now try it for yourself!


And here is the variation mom and I did this year:


Instead of putting a small amount of frosting in the center of each cookie, scoop some up with a spoon and put some of those finely ground pecans (or toffee pieces {pictured above}) on a plate and run the frosted section over it.

Seriously....delicious!

Tuesday, October 30, 2012

Halloween Treats

Nothing says Halloween more than Jack O'Lantern Cookies that my mom used to make.  I was also inspired on our Orlando vacation to make Cauldron Cakes that we saw at Zonkos. They are a chocoholics treat, which makes Wesley very happy.  I was inspired by this recipe, but left off the chocolate butter-cream frosting to better enjoy the fantastic chocolate mouse filling and swapped the base from a chocolate cupcake with a chocolate chip muffin to make it more authentic.  

Here's the recipe for Jack O'Lantern Cookies:


Cookies:

2 eggs
2 c sugar
3/4 c butter, melted
3 1/2 c flour
2T baking powder
1/2 t salt
1 t ground ginger
1/2 t ground cinnamon
2 T water
1 t vanilla
1 1/2 c finely chopped pecans (optional)

Cream the eggs, sugar, and butter.  Combine the flour, baking powder, salt, ginger, and cinnamon in a separate bowl and gradually add to the egg mixture on low speed.  Stir in the water, vanilla and pecans (optional).  Divide the dough into fourths and wrap in foil.  Chill for at least 2 hours.  Once chilled, roll the dough into 1/8 thickness (use powdered sugar instead of flour!!) and cut into 3 inch circles with a biscuit cutter.  Place on lightly greased pan and bake at 375 for 7-8 minutes until lightly browned.  


Frosting:

3T butter, softened
1/4 c + 1 1/2 t whipping cream
1/8 t salt
3 3/4 c powdered sugar
1 1/2 t vanilla
orange paste food coloring

10oz semisweet chocolate, melted


Cream the butter, cream and salt.  Gradually add powdered sugar.  Stir in vanilla and use small amounts of the orange coloring to get the icing to the depth you want.  Spread onto cookies and pipe the melted chocolate to make faces.


Delicious!

Friday, September 7, 2012

Summer Favs

Confession, I don't really like summer...its just so hot.  Too hot.

However, I have loved a few things about this summer: 

1. Our garden.  


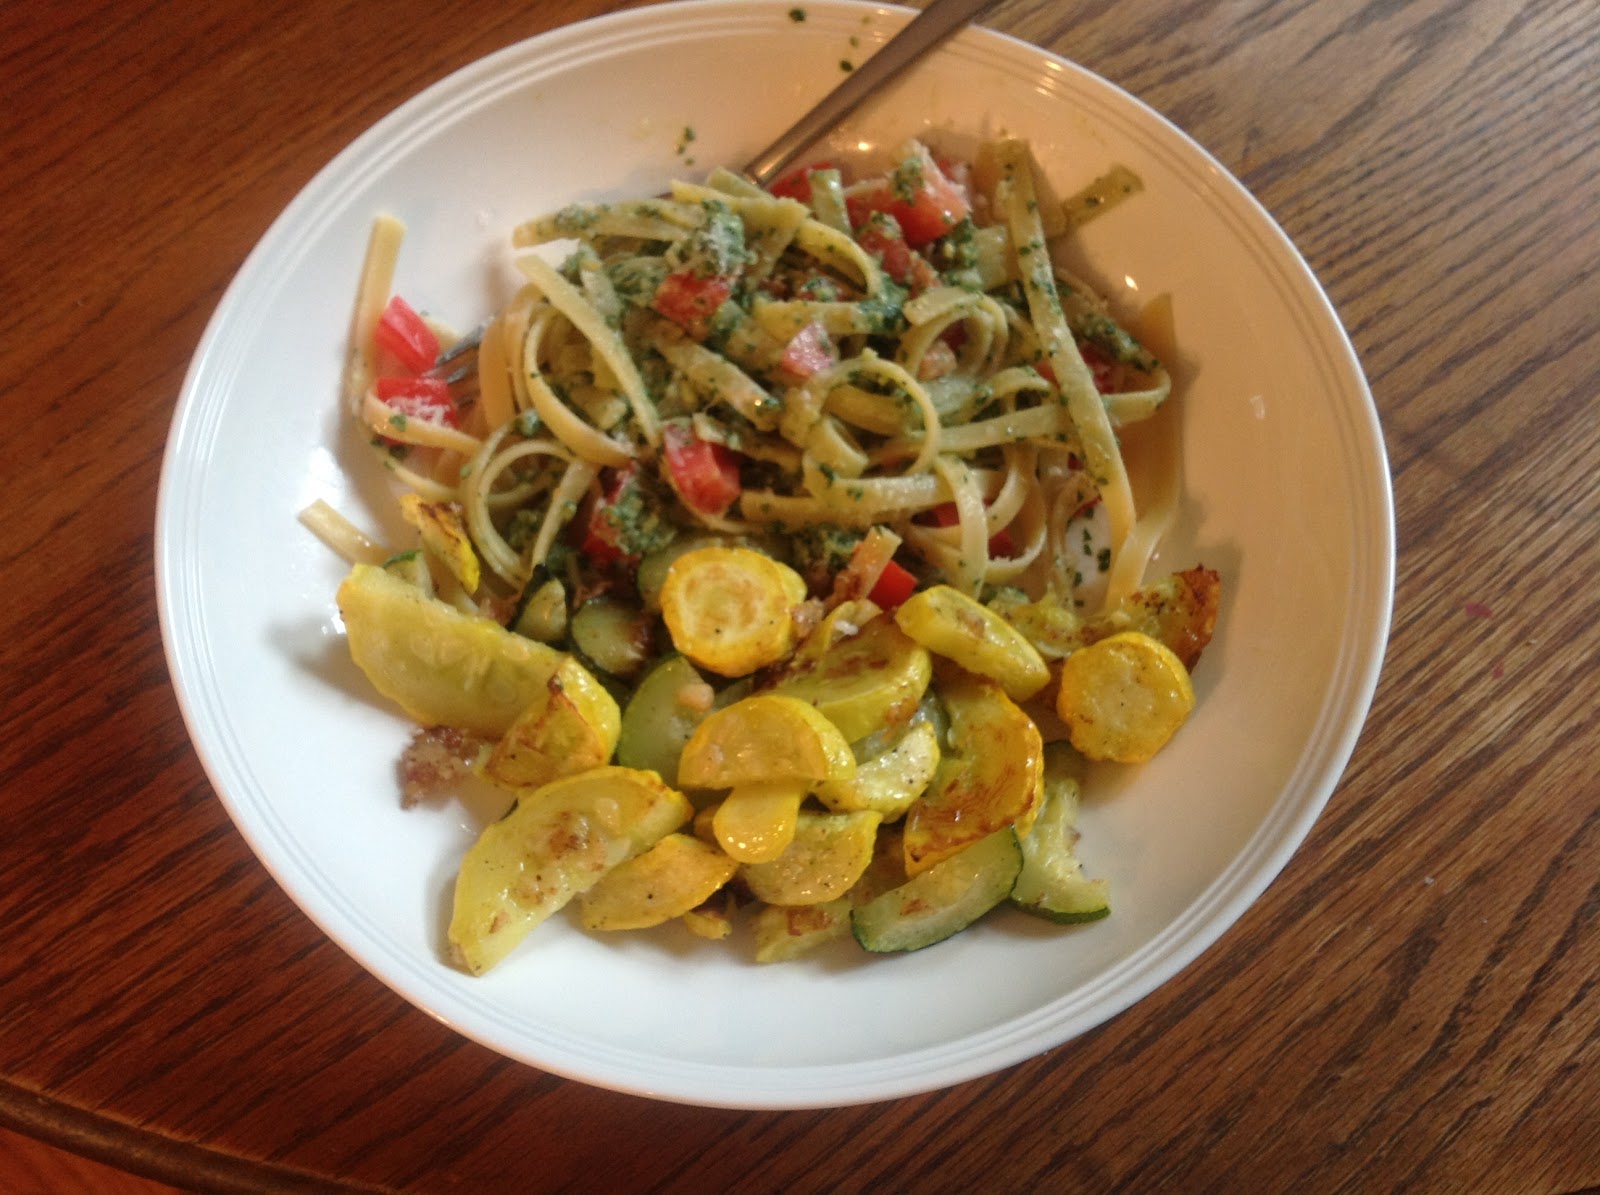
Unlike me, it loves the heat and we have gotten so much from it this year! This was one of many delicious suppers we got out of the garden:


2. Trip to Texas


It was so great to visit with my extended family in Houston again!  Hopefully it will become a tradition in these later years.  We always love the food (best Mexican ever), but this year I was also introduced to Charming Charlie's.  It was like the mecca of all jewelry stores.  You can imagine the elation when my sister Kelsey told me we have one in Raleigh.  Can't wait to check it out! 

And if you are ever in Houston, be sure to check out Gringos:


3. The Amazing Spiderman


So there were a lot of great movies that came out this summer, but I think this one was my favorite.  Um, Andrew Garfield....need I say more?  Wesley and I were so impressed with the script, actors, and pretty true to the original story line, that we have already gotten rid of the "older version" and are anticipating when this one comes out on BlueRay.  


4. Orlando Family Vacation


Three words:  Harry Potter World.  I have no shame admitting that I am a huge Harry Potter fan.  A much needed 5 day vacation to Universal Studios and Disney world was a great way to end our summer.  Oh, it was hot, but so worth it!


Cheers for summer being over... so excited for fall!


Thursday, February 2, 2012

Bottom of the Jar

Today was one of those days.  One of those days where you just didn't want to get out of bed.  Or think.  Or move.  


I have had a bad cold all week.  Today was the "I can't breathe day."  Let me tell you, it was super fun.  We are also short staffed at work right now.  Talk about feeling like you are at the bottom of the jar. 


Speaking of bottom of the jar.....


Even though I couldn't breathe, and was exhausted, the excitement of trying Bottom of the Jar Nachos mustered up enough energy in me to make them.


Queso Dip


They are too easy and too delicious. Could there be a better use for the last few bites of salsa??


If you happen to have a day like mine, while you eat them you will suddenly forget that you can't breathe and suddenly forget that you are exhausted.  Yes, they are those kind of nachos.


Lesson of the Day: part of enjoying life, is making sure you make the time to do (or eat) something that you love.


Thank you Rachael Ray!  

Related Posts Plugin for WordPress, Blogger...